User Tools
Table of Contents
The Mill
Request an account
You can request an account on the Mill by filling out the account request form at help.mst.edu in the HPC Cluster category:help.mst.edu
SSH Keys
If you want to connect using SSH keys, either to avoid having to type in your password, or are wanting to connect from off campus without a VPN, you can add your SSH public key to Mill.
For Windows users, we recommend using MobaXterm https://mobaxterm.mobatek.net. Powershell, git bash, and putty are some other available options. Mac and Linux users can use the default terminal. Generating an SSH Key
You can generate a new SSH key on your local machine. After you generate the key, you can add the public key to your account on Mill.
  Open terminal
  Paste the text below, replacing the email used in the example with your University email address.
ssh-keygen -t ed25519 -C “sso@example.com”
Note: If you are using a legacy system that doesn't support the Ed25519 algorithm, use:
ssh-keygen -t rsa -b 4096 -C "sso@example.com"
This creates a new SSH key, using the provided email as a label.
Generating public/private ALGORITHM key pair.
When you're prompted to “Enter a file in which to save the key”, you can press Enter to accept the default file location. Please note that if you created SSH keys previously, ssh-keygen may ask you to rewrite another key, in which case we recommend creating a custom-named SSH key. To do so, type the default file location and replace id_ALGORITHM with your custom key name.
# Windows Enter file in which to save the key (/c/Users/USERNAME/.ssh/id_ALGORITHM):[Press enter] # Mac Enter a file in which to save the key (/Users/USERNAME/.ssh/id_ALGORITHM): [Press enter] # Linux Enter a file in which to save the key (/home/USERNAME/.ssh/id_ALGORITHM):[Press enter]
At the prompt, type a secure passphrase.
Enter passphrase (empty for no passphrase): [Type a passphrase] Enter same passphrase again: [Type passphrase again]
Adding your SSH key
You may add your own SSH public key to your Mill account. You can also send the key to tdx.umsystem.edu and we can add it to your Mill account.
Copy the contents of your SSH public key, which is written to the file created in the Generating an SSH Key step.
# Windows Your public key has been saved in /c/Users/USERNAME/.ssh/id_ALGORITHM.pub # Mac Your public key has been saved in /Users/USERNAME/.ssh/id_ALGORITHM.pub # Linux Your public key has been saved in /home/USERNAME/.ssh/id_ALGORITHM.pub # Windows
The id_ALGORITHM.pub file contents should look similar to the ones below.
# ed25519 ssh-ed25519 AAAAB3NzaC1yc2EAAAABIwAAAQEAklOUpkDHrfHY17SbrmTIpNLTGK9Tjom/BWDSUGP truman@example.com
# rsa ssh-rsa AAAAB3NzaC1yc2EAAAABIwAAAQEAklOUpkDHrfHY17SbrmTIpNLTGK9Tjom/BWDSUGPl+nafzlHDTYW7hdI4yZ5ew18JH4JW9jbhUFrviQzM7xlELEVf4h9lFX5QVkbPppSwg0cda3Pbv7kOdJ/MTyBlWXFCR+HAo3FXRitBqxiX1nKhXpHAZsMciLq8V6RjsNAQwdsdMFvSlVK/7XAt3FaoJoAsncM1Q9x5+3V0Ww68/eIFmb1zuUFljQJKprrX88XypNDvjYNby6vw/Pb0rwert/EnmZ+AW4OZPnTPI89ZPmVMLuayrD2cE86Z/il8b+gw3r3+1nKatmIkjn2so1d01QraTlMqVSsbxNrRFi9wrf+M7Q== truman@example.com
Add your public key to your account by appending it to your authorized_keys file on Mill
[sso@mill-login ~]$ vim /home/sso/.ssh/authorized_keys
OR send us your public key.
System Information
DOI and Citing the Mill
Please ensure you use The Mill's DOI on any publications in which The Mill's resources were utilized. The DOI is https://doi.org/10.71674/PH64-N397
Please also feel free to use these files with your citation manager to create formatted citations.
BibTex Citation:
- mill_cluster_citation.bib
@Article{Gao2024,
  author    = {Gao, Stephen and Maurer, Jeremy and Information Technology Research Support Solutions },
  title     = {The Mill HPC Cluster},
  year      = {2024},
  doi       = {10.71674/PH64-N397},
  language  = {en},
  publisher = {Missouri University of Science and Technology},
  url       = {https://scholarsmine.mst.edu/the-mill/1/},
}
RIS Citation:
- mill_cluster_citation.ris
TY  - JOUR
AU  - Stephen, Gao
AU  - Jeremy, Maurer
AU  - Solutions, Information Technology Research Support
DO  - 10.71674/PH64-N397
LA  - en
PU  - Missouri University of Science and Technology
PY  - 2024
ST  - The Mill HPC Cluster
TI  - The Mill HPC Cluster
UR  - https://scholarsmine.mst.edu/the-mill/1/
ER  -
Software
The Mill was built and managed with Puppet. The underlying OS for the Mill is Alma 8.9. For resource management and scheduling we are using SLURM Workload manager version 22.05.2
Hardware
Management nodes
The head nodes and login nodes are virtual, making this one of the key differences from the previous generation cluster named Foundry.
Compute nodes
The newly added compute nodes are Dell R6525 nodes configured as follows.
Dell R6525: 1 rack unit servers each containing dual 64 core AMD EPYC Milan 7713 CPUs with a base clock of 2 GHz and a boost clock of up to 3.675 GHz. Each R6525 node contains 512 GB DDR4 system memory.
As of 5 April 2024 the compute nodes available are:
| Model | CPU Cores | System Memory | Node Count |
| Dell R6525 | 128 | 512 GB | 25 |
| Dell C6525 | 64 | 256 GB | 160 |
| Dell C6420 | 40 | 192 GB | 44 |
GPU nodes
The newly added GPU node is a Dell XE9680. This system has 8 H100 GPU's each with 80GB of Memory and dual 56 core Intel Xeon Platinum 8480+ with a base clock of 2 GHz and a boost clock of up to 3.80 GHz. This node also contains 1TB of DDR5 system Memory.
GPU node availability is:
| Model | CPU cores | System Memory | GPU | GPU Memory | GPU Count | Node Count |
| Dell XE9680 | 112 | 1 TB | H100 SXM5 | 80 GB | 8 | 1 |
| Dell C4140 | 40 | 192 GB | V100 SXM2 | 32 GB | 4 | 6 |
| Dell R740xd | 40 | 384 GB | V100 PCIe | 32 GB | 2 | 1 |
A specially formatted sinfo command can be ran on the Mill to report live information about the nodes and the hardware/features they have.
sinfo -o "%5D %4c %8m %28f %35G"
Storage
General Policy Notes
None of the cluster attached storage available to users is backed up in any way by us, this means that if you delete something and don't have a copy somewhere else, it is gone. Please note the data stored on cluster attached storage is limited to Data Class 1 and 2 as defined by UM System Data Classifications. If you have need to store things in DCL3 or DCL4 please contact us so we may find a solution for you.
Home Directories
The Mill home directory storage is available from an NFS share backed by our enterprise SAN, meaning your home directory is the same across the entire cluster. This storage will provide 10 TB of raw storage, limited to 50GB per user. This volume is not backed up, we do not provide any data recovery guarantee in the event of a storage system failure. System failures where data loss occurs are rare, but they do happen. All this to say, you should not be storing the only copy of your critical data on this system. Please contact us if you require more storage and we can provide you with the currently available options.
Scratch Directories
In addition to your 50GB home directory, you also have access to a high-performance network-mounted scratch storage space. This is meant for temporary storage of files that are currently being used for computations, not for anything resembling permanent or project storage. If there are intermediate results or files that you need to store between jobs that you will submit back-to-back, this is a good place to store such things. To change directory to this storage you can use the “cdsc” command which we have provided for ease of use. The path for this area is “/share/ceph/scratch/$USER” where $USER is the username you use to log in to the Mill. We may clean this space during maintenance and reserve the right to clean it immediately if that becomes necessary for continued quality of service, so make sure you are not storing anything there that you cannot afford to lose, or do not have backed up elsewhere.
There is also local scratch on each compute node for use during calculations in /local/scratch. On the Mill this is 1.5TB in size. If you use this space we request that you add a cleanup command to your job to delete your files at the end of your job and make sure the space remains available for others. Things stored in this space will only be available to processes executing on the node in which they were created. Meaning if you create it in /local/scratch in a job, you won't be able to see it on the login node, and other processes won't be able to see it if they are on a different node than the process which created the file.
Leased Space
If home directory, and scratch space availability aren't enough for your storage needs we also lease out quantities of cluster attached space. If you are interested in leasing storage please contact us. Additional information on the STRIDE storage allocations can be found here STRIDE storage model. Below is a cost model of our storage offerings:
Vast Storage Cluster:
| Total Size | 250 TB |
| Storage Technology | Flash |
| Primary Purpose | High Performance Computing Storage |
| Cost | $160/TB/Year |
Ceph Storage Cluster:
| Total Size | 800 TB |
| Storage Technology | Spinning Disk |
| Primary Purpose | HPC-attached Utility Storage |
| Cost | $100/TB/Year |
Policies
Under no circumstances should your code be running on the login node.
You are allowed to install software in your home directory for your own use. Know that you will *NOT* be given root/sudo access, so if your software requires it you will not be able to use that software without our help. Contact ITRSS about having the software installed as modules for large user groups.
User data on the Mill is not backed up meaning it is your responsibility to back up important research data to a location off site via any of the methods in the moving_data section.
By default, everyone's jobs can run on any compute node in the cluster, even the ones dedicated to priority partitions, however if the any user who has priority access to that dedicated node then your job will stop and go back into the queue. You may prevent this preemption by specifying to run on just the non-dedicated nodes in your job file, please see the documentation on how to submit this request.
If you have purchased a priority lease, you will need to submit your job to your priority partition and account, otherwise your job will fall into the same partition which contains all nodes. Jobs submitted to your priority partition will requeue any job running on the node you need in a lower priority partition. This means that even your own jobs, if running in the requeue partition, are subject to being requeued by your higher priority job. This also means that other users with access to your priority partition may submit jobs that will compete with yours for resources, but not bump yours into requeued status. If you submit your job to your priority partition it will run to completion, failure, or until it runs through the entire execution time you've given it.
Partitions
The Hardware in the Mill is split up into separate groups, or partitions. Some hardware is in more than one partition, if you do not define which partition to use, it will fall into the default partition requeue. However there are a few cases that you will want to assign a job to a specific partition. Please see the table below for a list of the limits or default values given to jobs based on the partition. The important thing to note is how long you can request your job to run.
| Partition | Time Limit | Default Memory per CPU |
| requeue | 2 days | 800MB |
| general | 2 days | 800MB |
| gpu | 2 days | 800MB |
| interactive | 4 hours | 800MB |
| rss-class | 4 hours | 2GB |
| any priority partition | 28 days | varies by hardware |
Priority Partition Leasing
For the full information on our computing model please visit this page on The Mill Computing Model which will provide more information what a priority partition is.
Below is a list of hardware which we have available for priority leases:
| C6525 | R6525 | C4140 | |
| CPU type | AMD 7502 | AMD 7713 | Intel 6248 |
| CPU count | 2 | 2 | 2 |
| Core count | 64 | 128 | 40 |
| Base Clock (GHz) | 2.5 | 2.0 | 2.5 |
| Boost Clock (GHz) | 3.35 | 3.675 | 3.2 |
| GPU | N/A | N/A | Nvidia V100 |
| GPU Count | 0 | 0 | 4 |
| GPU RAM (GB) | 0 | 0 | 32×4 |
| RAM (GB) | 256 | 512 | 192 |
| Local Scratch (TB) | 2.6 SSD | 1.6 NVMe | 1.6 NVMe |
| Network | HDR-100 | HDR-100 | HDR-100 |
| Internal Bandwidth | 100Gb/s | 100Gb/s | 100Gb/s |
| Latency | <600ns | <600ns | <600ns |
| Priority lease ($/year) | $3,368.30 | $4,379.80 | $7,346.06 |
| Current Quantity | 160 | 25 | 6 |
Researcher Funded Nodes
Researcher funded hardware will gain priority access for a minimum of 5 years. Hosting fees will start at $1,200 per year and will be hardware dependent. The fees will be broke down as follows:
| Fee | Cost | Annual Unit of Measure |
| Networking Fee | $90 | Per Network Connection |
| Rack Space | $260 | Per Rack U |
| RSS Maintenance | $850 | Per Node |
Quick Start
We may have a quick start video in the future.
If you're using https://mill-classes.mst.edu please reference this quickstart guide Mill-Classes
Quick reference guide for research usage below:
Logging in
SSH (Linux)
Open a terminal and type
ssh username@mill.mst.edu
replacing username with your campus sso username, Enter your sso password
Logging in places you onto the login node. Under no circumstances should you run your code on the login node.
If you are submitting a batch file, then your job will be redirected to a compute node to be computed.
However, if you are attempting use a GUI, ensure that you do not run your session on the login node (Example: username@mill-login-p1). Use an interactive session to be directed to a compute node to run your software.
salloc --time=1:00:00 --x11
Putty (Windows)
Open Putty and connect to mill.mst.edu using your campus SSO.

Off Campus Logins
Our off campus logins use public key authentication only, password authentication is disabled for off campus users unless they are connected to the campus VPN. Please send your public key to itrss-support@umsystem.edu with the subject of “Mill Public Key Access”. After setting up your client to use your key, you still use the host mill.mst.edu to connect, however now without need for using the VPN.
Submitting a job
Using SLURM, you need to create a submission script to execute on the backend nodes, then use a command line utility to submit the script to the resource manager. See the file contents of a general submission script complete with comments.
Example Job Script
- batch.sub
#!/bin/bash
#SBATCH --job-name=Change_ME
#SBATCH --ntasks=1
#SBATCH --time=0-00:10:00
#SBATCH --mail-type=begin,end,fail,requeue
#SBATCH --export=all
#SBATCH --out=Mill-%j.out

# %j will substitute to the job's id
#now run your executables just like you would in a shell script, Slurm will set the working directory as the directory the job was submitted from.
#e.g. if you submitted from /home/username/softwaretesting your job would run in that directory.

#(executables) (options) (parameters)
echo "this is a general submission script"
echo "I've submitted my first batch job successfully"
Now you need to submit that batch file to the scheduler so that it will run when it is time.
sbatch batch.sub
You will see the output of sbatch after the job submission that will give you the job number, if you would like to monitor the status of your jobs you may do so with the squeue command. If you submit a job to the requeue partition you will receive a warning message like:
sbatch: Warning, you are submitting a job the to the requeue partition. There is a chance that your job
will be preempted by priority partition jobs and have to start over from the beginning.
Submitted batch job 167
Common SBATCH Directives
| Directive | Valid Values | Description |
| –job-name= | string value no spaces | Sets the job name to something more friendly, useful when examining the queue. |
| –ntasks= | integer value | Sets the requested CPUS for the job |
| –nodes= | integer value | Sets the number of nodes you wish to use, useful if you want all your tasks to land on one node. |
| –time= | D-HH:MM:SS, HH:MM:SS | Sets the allowed run time for the job, accepted formats are listed in the valid values column. |
| –mail-type= | begin,end,fail,requeue | Sets when you would like the scheduler to notify you about a job running. By default no email is sent |
| –mail-user= | email address | Sets the mailto address for this job |
| –export= | ALL,or specific variable names | By default Slurm exports the current environment variables so all loaded modules will be passed to the environment of the job |
| –mem= | integer value | Amount of memory in MB you would like the job to have access to, each queue has default memory per CPU values set so unless your executable runs out of memory you will likely not need to use this directive. |
| –mem-per-cpu= | integer | Amount of memory in MB you want per cpu, default values vary by queue but are typically 800MB. |
| –nice= | integer | Allows you to lower a jobs priority if you would like other jobs set to a higher priority in the queue, the higher the nice number the lower the priority. |
| –constraint= | please see sbatch man page for usage | Used only if you want to constrain your job to only run on resources with specific features, please see the next table for a list of valid features to request constraints on. |
| –gres= | name:count | Allows the user to reserve additional resources on the node, specifically for our cluster gpus. e.g. –gres=gpu:2 will reserve 2 gpus on a gpu enabled node |
| -p | partition_name | Not typically used, if not defined jobs get routed to the highest priority partition your user has permission to use. If you were wanting to specifically use a lower priority partition because of higher resource availability you may do so. |
Valid Constraints
| Feature | Description |
| intel | Node has intel CPUs |
| amd | Node has amd CPUs |
| EDR | Node has an EDR (100Gbit/sec) infiniband interconnect |
| gpu | Node has GPU acceleration capabilities |
| cpucodename* | Node is running the codename of cpu you desire e.g. rome |
Note if some combination of your constraints and requested resources is unfillable you will get a submission error when you attempt to submit your job.
Monitoring your jobs
 squeue -u username
JOBID PARTITION     NAME     USER ST       TIME  NODES NODELIST(REASON)
  167   requeue fahgpu_v jonesjos  R       2:50      1 compute-41-01
Cancel your job
scancel - Command to cancel a job, user must own the job being cancelled or must be root.
scancel <jobnumber>
Viewing your results
Output from your submission will go into an output file in the submission directory, this will either be slurm-jobnumber.out or whatever you defined in your submission script. In our example script we set this to mill-jobnumber.out, this file is written asynchronously so it may take a bit after the job is complete for the file to show up if it is a very short job.
Moving Data
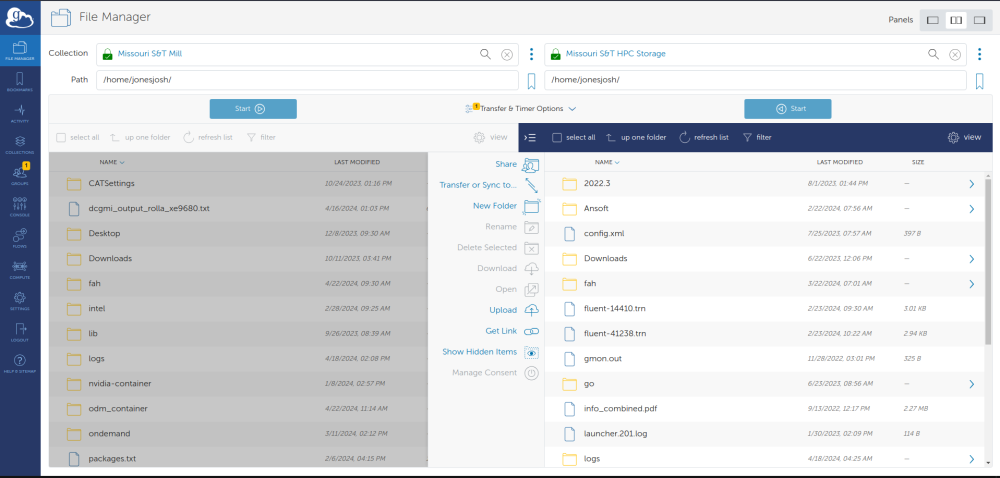
Users can use Globus to move data to The Mill. You can use Globus by going to globus.org and logging in with your university account.The collection name for The Mill home directories is “Missouri S&T Mill”. If you want to migrate date from The Foundry to The Mill you will need to connect to both collections. The Foundry's collection name is “Missouri S&T HPC Storage”. Once you are connected to both collections you can just drag and drop from one system to another and Globus will manage actually moving the data. The screen will look something like this:
Modules
An important concept for running on the cluster is modules. Unlike a traditional computer where you can run every program from the command line after installing it, with the cluster we install the programs to a main “repository” so to speak, and then you load only the ones you need as modules. To see which modules are available for you to use you would type “module avail”. Once you find which module you need for your file, you type “module load <module>” where <module> is the module you found you wanted from the module avail list. You can see which modules you already have loaded by typing “module list”.
Here is the output of module avail as of 10/23/2023
[jonesjosh@mill-login-p1 ~]$ module avail

--------------------------------- /usr/share/lmod/lmod/modulefiles/Core ---------------------------------
   lmod    settarg

------------------------------------ /share/apps/modulefiles/common -------------------------------------
   anaconda/2023.07    gcc/12.2.0      intelmpi/2023.2     openfoam/11
   cmake/3.27.4        intel/2023.2    libfabric/1.19.0    openmpi/4.1.5/gcc/12.2.0

If the avail list is too long consider trying:

"module --default avail" or "ml -d av" to just list the default modules.
"module overview" or "ml ov" to display the number of modules for each name.

Use "module spider" to find all possible modules and extensions.
Use "module keyword key1 key2 ..." to search for all possible modules matching any of the "keys".
Compiling Code
There are several compilers available through modules, to see a full list of modules run
module avail
the naming scheme for the compiler modules are as follows.
MPI_PROTOCOL/MPI_VERSION/COMPILER/COMPILER_VERSION e.g openmpi/4.1.5/gcc/12.2.0 is the openmpi libraries version 4.1.5 built with the gcc compiler version 12.2.0. All mpi libraries are set to communicate over the high speed infiniband interface. The exception to this rule of naming is the intelmpi, which is just intelmpi/INTEL_VERSION since it is installed only with the intel compiler.
After you have decided which compiler you want to use you need to load it.
module load openmpi/4.1.5/gcc/12.2.0
Then compile your code, use mpicc for c code and mpif90 for fortran code. Here is an MPI hello world C code.
- helloworld.c
/* C Example */
#include <stdio.h>
#include <mpi.h>


int main (argc, argv)
     int argc;
     char *argv[];
{
  int rank, size;

  MPI_Init (&argc, &argv);	/* starts MPI */
  MPI_Comm_rank (MPI_COMM_WORLD, &rank);	/* get current process id */
  MPI_Comm_size (MPI_COMM_WORLD, &size);	/* get number of processes */
  printf( "Hello world from process %d of %d\n", rank, size );
  MPI_Finalize();
  return 0;
}
Use mpicc to compile it.
mpicc ./helloworld.c
Now you should see a a.out executable in your current working directory, this is your mpi compiled code that we will run when we submit it as a job.
Parallelizing your Code
The following link provides basic tutorials and examples for parallel code in Python, R, Julia, Matlab, and C/C++.
Submitting an MPI job
You need to be sure that you have the same module loaded in your job environment as you did when you compiled the code to ensure that the compiled executables will run correctly, you may either load them before submitting a job and use the directive
#SBATCH --export=all
in your submission script, or load the module prior to running your executable in your submission script. Please see the sample submission script below for an mpi job.
- helloworld.sub
#!/bin/bash
#SBATCH -J MPI_HELLO
#SBATCH --ntasks=8
#SBATCH --export=all
#SBATCH --out=Mill-%j.out
#SBATCH --time=0-00:10:00
#SBATCH --mail-type=begin,end,fail,requeue

module load openmpi/4.1.5/gcc/12.2.0
mpirun ./a.out
Now we need to submit that file to the scheduler to be put into the queue.
sbatch helloworld.sub
You should see the scheduler report back what job number your job was assigned just as before, and you should shortly see an output file in the directory you submitted your job from.
Interactive jobs
Some things can't be run with a batch script because they require user input, or you need to compile some large code and are worried about bogging down the login node. To start an interactive job simply use the
sinteractive
command and your terminal will now be running on one of the compute nodes. The hostname command can help you confirm you are no longer running on a login node. Now you may run your executable by hand without worrying about impacting other users. The sinteractive script by default will prompt you for resource constraints with the default listed.

This will connect you to a compute node with a splash screen that looks something like:

You can then hit the key combination of Ctrl+a followed by 0 to get to a terminal or Ctrl+a followed by 9 to pull up htop. When you are done with your session you can hit Ctrl+a followed by d to end your session.
If you will need a GUI Window for whatever you are running inside the interactive job you will need to connect to The Mill with X forwarding enabled. For Linux this is simply adding the -X switch to the ssh command.
ssh -X mill.mst.edu
For Windows there are a couple X server software's available for use, x-ming and x-win32 that can be configured with putty. Here is a simple guide for configuring putty to use xming.
Job Arrays
If you have a large number of jobs you need to start I recommend becoming familiar with using job arrays, basically it allows you to submit one job file to start up to 10000 jobs at once.
One of the ways you can vary the input of the job array from task to task is to set a variable based on which array id the job is and then use that value to read the matching line of a file. For instance the following line when put into a script will set the variable PARAMETERS to the matching line of the file data.dat in the submission directory.
PARAMETERS=$(awk -v line=${SLURM_ARRAY_TASK_ID} '{if (NR == line) { print $0; };}' ./data.dat)
You can then use this variable in your execution line to do whatever you would like to do, you just have to have the appropriate data in the data.dat file on the appropriate lines for the array you are submitting. See the sample data.dat file below.
- data.dat
"I am line number 1"
"I am line number 2"
"I am line number 3"
"I am line number 4"
you can then submit your job as an array by using the –array directive, either in the job file or as an argument at submission time, see the example below.
- array_test.sub
#!/bin/bash
#SBATCH -J Array_test
#SBATCH --ntasks=1
#SBATCH --out=Mill-%j.out
#SBATCH --time=0-00:10:00
#SBATCH --mail-type=begin,end,fail,requeue


PARAMETERS=$(awk -v line=${SLURM_ARRAY_TASK_ID} '{if (NR == line) { print $0; };}' ./data.dat)

echo $PARAMETERS
I prefer to use the array as an argument at submission time so I don't have to touch my submission file again, just the data.dat file that it reads from.
sbatch --array=1-2,4 array_test.sub
Will execute lines 1,2, and 4 of data.dat which echo out what line number they are from my data.dat file.
You may also add this as a directive in your submission file and submit without any switches as normal. Adding the following line to the header of the submission file above will accomplish the same thing as supplying the array values at submission time.
#SBATCH --array=1-2,4
Then you may submit it as normal
sbatch array_test.sub
Priority Access
Information coming on priority access leases.
Applications
The applications portion of this wiki is currently a Work in progress, not all applications are currently here, nor will they ever be as the applications we support continually grows.
Abaqus
COMING SOON:
- Default Version = 2022
- Other versions available: 2020
Using Abaqus
Abaqus should not be operated on the login node at all.
Be sure you are connected to the Mill with X forwarding enabled, and running inside an interactive job using command
sinteractive
Before you attempt to run Abaqus. Running sinteractive without any switches will give you 1 cpu for 10 minutes, if you need more time or resources you may request it. See Interactive Jobs for more information.
Once inside an interactive job you need to load the Abaqus module.
module load abaqus/2023
Now you may run abaqus.
ABQLauncher cae -mesa
Altair Feko
Feko should not be operated on the login node at all.
Be sure you are connected to the Mill with X forwarding enabled, and running inside an interactive job using command
sinteractive
Before you attempt to run Feko. Running sinteractive without any switches will give you 1 cpu for 10 minutes, if you need more time or resources you may request it. See Interactive Jobs for more information.
Once inside an interactive job you need to load the Feko module.
module load feko/2023
Now you may run Feko.
feko_launcher
You can also use a submission file similar to this one, changing the email, :
- feko_test.sub
#!/bin/bash
#--------------------------------------------------------------------------------
#  SBATCH CONFIG
#--------------------------------------------------------------------------------
#SBATCH --partition=general                             #name of the partition
#SBATCH --nodes=1                                       #nodes requested
#SBATCH --cpus-per-task=1                               #no. of cpu's per task
#SBATCH --ntasks=8                                      #no. of tasks (cpu cores)
#SBATCH --mem=8G                                        #memory requested
#SBATCH --job-name=feko_job                             #job name
#SBATCH --time=0-02:00:00                               #time limit in the form days-hours:minutes
#SBATCH --output=feko_job_%j.out                        #out file with unique jobid
#SBATCH --error=feko_job_%j.err                         #err file with unique jobid
#SBATCH --mail-type=BEGIN,FAIL,END                      #email sent to user during begin,fail and end of job
##SBATCH --mail-user=$USER@umsystem.edu                 #email id to be sent to(please change your email id)

echo "### Starting at: $(date) ###"

# loading module
module load feko/2023

srun runfeko $1 --use-job-scheduler

echo "### Ending at: $(date) ###"
and run it with sbatch feko.sub file where feko.sub is the name of the submission file, and file is the name of the Feko file.
Anaconda
If you would like to install packages via conda, you may load the module for the version you prefer (anaconda, miniconda, mamba) to get access to conda commands. After loading the module you will need to initialize conda to work with your shell.
# miniconda and mamba are also available
module load anaconda

conda init
This will ask you what shell you are using, and after it is done it will ask you to log out and back in again to load the conda environment. After you log back in your command prompt will look different than it did before. It should now have (base) on the far left of your prompt. This is the virtual environment you are currently in. Since you do not have permissions to modify base, you will need to create and activate your own virtual environment to build your software inside of.
# to create in default location (~/.conda/envs)
conda create -n ENVNAME
conda activate ENVNAME

# to create in custom location (only do this if you have a reason to)
conda create -n ENVNAME -p /path/to/location
conda activate /path/to/location
Now instead of (base) it should say (ENVNAME). These environments are stored in your home directory so they are unique to you. If you are working together with a group, see the sections below about rebuilding or moving an environment, or if you have shared storage read the section about creating single environments in a different folder and moving the default conda install directory and choose the solution that is best for your team.
Once you are inside your virtual environment you can run whatever conda installs you would like and it will install them and dependencies inside this environment. If you would like to execute code that depends on the modules you install you will need to be sure that you are inside your virtual environment. (myenv) should be shown on your command prompt, if it is not, activate it with `conda activate`.
- Rebuilding or Moving Conda Environments
The recommended method for moving an environment to a new location is to save its configuration and rebuild it in the new location, so the instructions for both processes are the same.
In order to create a configuration file for a Conda environment, run the following commands:
# Activate the env you wish to export
conda activate ENVNAME

# Export the configuration
conda env export > ENVNAME.yml
If you are simply moving to a new system,copy the file and rebuild the env.
conda env create -f ENVNAME.yml
If you need to specify a location for just this one env, you can specify a prefix.
conda env create -f ENVNAME.yml -p /path/to/install/location/
- Moving Env's by Moving the Default Conda Install Directory
If you want to permanently change the conda install directory, you need to generate a .condarc file and tell conda where it needs to install your environments from now on. The paths you specify should point to folders.
If you are intending for all lab members to install env's in shared storage, each member will need to generate the .condarc file and set the paths for their own Conda configuration
# Generate .condarc
conda config

# Add new package install directory
conda config --add pkgs_dirs /full/path/to/pkgs/

# Add new env install directory
conda config --add envs_dirs /full/path/to/envs/
You can check your configuration by making sure these new paths are listed first in their respective fields when you run:
conda info
You may also need to temporarily rename your original conda folder so that your new environments can have the same name as the old ones.
## Remember to delete conda-old once you have verified
## that the new env's work properly, otherwise you are
## not saving space!

mv ~/.conda ~/conda-old
Now you can reinstall the environments as usual, but they will be stored in the new location.
conda env create -f ENVNAME.yml
Because we updated the paths earlier you can still activate your environments like normal even though the location has changed.
- Using Conda Envs With Jupyter in OpenOnDemand
There is a simple way to import your conda environment to use as a kernel in Jupyter in OpenOnDemand.
First you must connect to the cluster and activate the env you wish to import
ssh USER@mill.mst.edu

source activate ENVNAME
Next you must install two additional packages to the env.
conda install -c anaconda ipykernel
Finally you must install the env as a kernel
python -m ipykernel install --user --name=ENVNAME
Now when you open Jupyter in OpenOnDemand you should see your env in the kernel selection dropdown menu.
VS Code
While VS Code is a very powerful tool, it should NOT be used to connect to the login node of the cluster. If you need to use VS Code there are several ways to do so.
- X Forwarding:
The first way to use VS Code is by using X forwarding through the regular slurm scheduler. First you will want to connect to the Mill with X forwarding enabled.
ssh -X mill.mst.edu
Next, you will want to start an interactive session on the cluster.
salloc --x11 --time=1:00:00 --ntasks=2 --mem=2G --nodes=1
Once you get a job, you will want to load the VS Code module with:
module load vscode/1.88.1
To launch VS Code in this job you simply run the command:
code
- OpenOnDemand:
The second way is through a web browser with our OnDemand system. If you go to mill-ondemand.mst.edu and sign in with your university account you will have access to VS Code via the Interactive Apps tab. Choose 'Interactive Apps ' → 'Vscode' and you will come to a new page where you can choose what account, partition, job length, number of cpus, memory amount and more to run your job with. Once you fill out all the resources you would like click launch. If there are enough resources free your job will start immediately, VS Code will launch on the cluster and you will be able to click 'Connect to VS Code'. You will then have a new tab opened with VS Code running on a compute node.
- VSCode Remote Tunnels:
This solution requires a GitHub account.
If You are not satisfied with the above solutions, the Remote Tunnels extension may be what you are looking for.
Step 1: Install the Remote Tunnels extension on the computer you wish to use to connect to the cluster. Link to Extension
Step 2: If you have not already, sign in to VSCode with your GitHub Account. If you don't have one you will need to create one to use this extension.
Step 3: connect to the login node normally using SSH and request an interactive session
ssh USER@mill.mst.edu

salloc -n 4 --mem 8G --time 60
remember to change the resource values to meet your needs, especially time.
Step 4: Load the VSCode module and create the tunnel by running the following command.
module load vscode

code tunnel
This will create the tunnel. You should see an 8 digit code and a link to GitHub. Follow the link, sign in if necessary, and input the 8 digit code. You should then see a browser prompt to open VSCode. Click to accept this, and VSCode will automatically connect to the tunnel which is running in your interactive session.
If your local VSCode does not automatically connect to the tunnel, you can tell it to connect manually. To do this, click the green box at the bottom left with the icon that resembles ><. Then from the menu that appears, select “Connect to Tunnel…” and select the option with the name of the compute node where your interactive session is running. This should resemble “compute-11-22”.
- Do not close the window with your interactive session. Closing this will close your tunnel -